
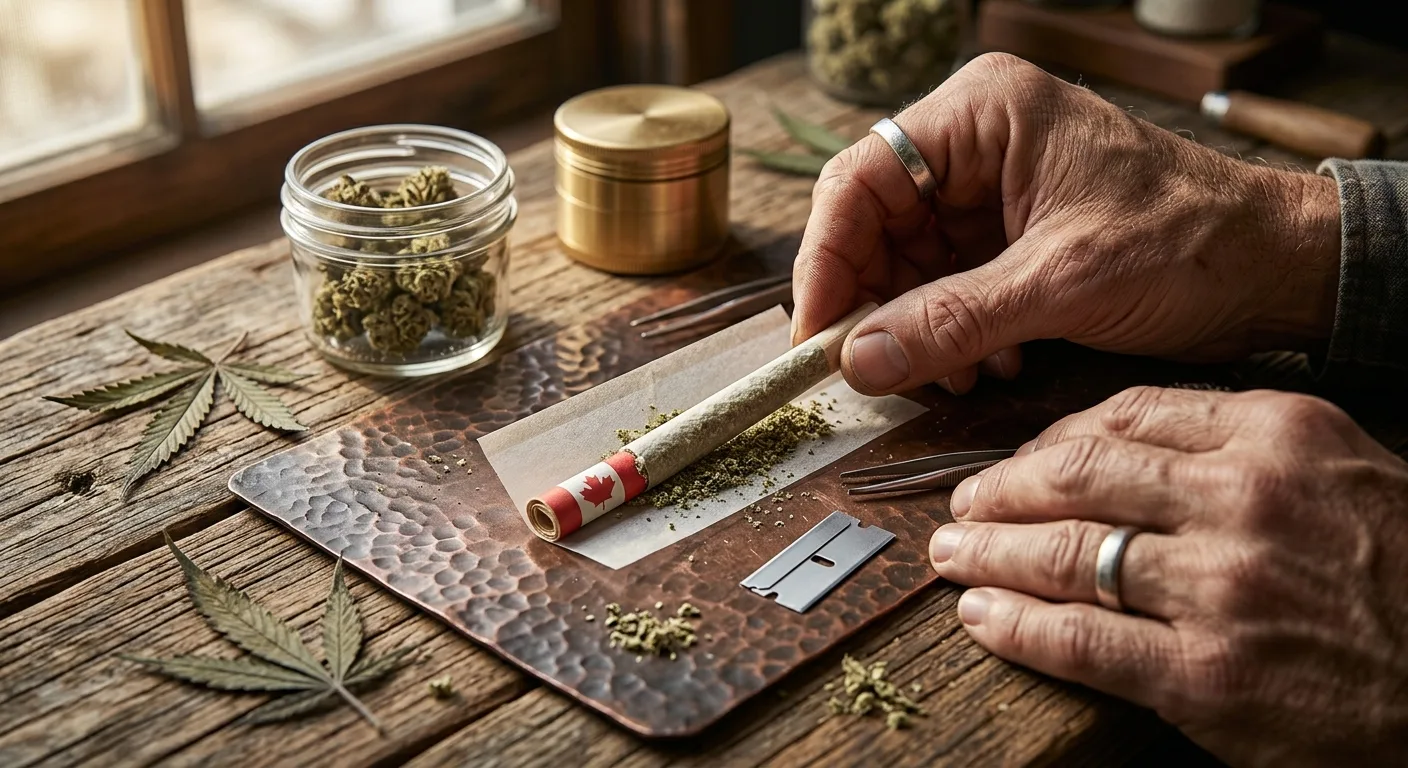
Rolling a joint is one of those skills that seems impossibly difficult until you learn the pattern, then becomes automatic muscle memory. If you've fumbled through crumpled papers, uneven rolls, or joints that canoe halfway through, you're not alone. Most cannabis users spent their first few attempts watching perfectly good flower spill across a table while wondering how anyone makes it look easy.
This guide breaks down how to roll a joint into clear, sequential steps that work whether you're using standard rolling papers or something thicker like a Backwoods. The technique stays consistent across paper types, strain choices, and grind textures. By the end, you'll understand the mechanics behind a tight, even burn and the small adjustments that fix common problems before they start.
What You Actually Need Before You Start Rolling
The internet loves long equipment lists. You need four things: cannabis, rolling papers, a grinder, and something to create a filter tip. Everything else is optional convenience.
Your flower should be dry enough to grind cleanly but not so desiccated it turns to dust. If you're working with overly dry bud, rehydrating your cannabis for 12-24 hours will give you material that stays together during the roll instead of crumbling through the paper.
Standard 1¼-inch papers work for most smokers. King-size papers give you more room for error but require more flower to fill properly. Stick with unbleached, unflavored papers until you're confident with the basic technique. Flavoured papers mask mistakes initially but teach you nothing about proper rolling tension.
A quality grinder matters more than most beginners realize. Scissor-chopped flower creates uneven particle sizes that burn inconsistently. A two-piece or four-piece grinder produces uniform texture that distributes evenly in the paper. If you don't own one yet, our grinder comparison guide covers the differences that actually affect your roll quality.
The Filter Tip That Improves Every Joint
Some smokers skip the filter. Those smokers also deal with wet, collapsed ends, wasted flower stuck in the roach, and occasional bits of plant matter in their mouth. A proper filter tip (also called a crutch) costs nothing and solves all three problems.
Tear a small rectangle from thin cardboard, about 2cm by 4cm. Business cards, index cards, or the flap from your rolling paper package all work. Fold one end accordion-style three or four times, then roll the rest around it to create a cylinder slightly narrower than your paper width. The accordion section prevents collapse while the cylinder gives you something rigid to hold during the roll.
Step-by-Step: The Standard Joint Rolling Technique
This method works for right-handed and left-handed rollers. The hand positions matter less than understanding what each motion accomplishes. Most rolling failures happen because someone skips the shaping phase or rushes the tuck.
Step One: Create Your Paper Base
Hold the rolling paper with the gum strip facing up and away from you. Place your filter tip at one end, the right side for right-handed rollers. The filter should sit snug against the edge with minimal gap. That gap will widen during the roll, so start tight.
Grind your flower to medium consistency. Not powder, not chunky, somewhere between oregano and loose tea. Half a gram fills a standard joint, three-quarters of a gram for king-size papers. Distribute the ground cannabis along the paper in a loose line, slightly more in the middle than at the ends. The taper happens naturally during shaping.
Step Two: Shape the Cylinder
This step separates working joints from frustrating failures. Hold the paper between your thumbs and forefingers, cannabis resting in the valley between. Use gentle back-and-forth motion with your thumbs to work the flower into an even cylinder. You're not rolling yet, just shaping. The flower should form a smooth, consistent tube from filter to open end.
Add or remove material until the thickness feels uniform. Too much flower creates back pressure that makes the tuck impossible. Too little leaves you with a loose, floppy result. The cylinder should hold its shape when you pause the motion.
Step Three: The Tuck That Locks Everything In Place
Once your cylinder is shaped, it's time for the tuck. This is where most beginners rush and most joints fail. Tuck the non-gummed edge of the paper down and around the filter tip, using your thumbs to press it under the flower and against the back of the paper. Start at the filter end where you have something rigid to work against.
The initial tuck only needs to catch about a quarter-inch of paper. Don't try to tuck the entire length at once. Get the filter end secure, then work your way down the joint in small sections. Each thumb-width section should tuck cleanly before you move to the next. If the paper bunches or folds, back up and re-tuck that section with less pressure.
Step Four: Roll and Seal
With the non-gummed edge tucked, roll the joint upward away from you. The paper should wrap around the cylinder smoothly. When the gum strip is the only part left, lick it lightly and complete the final rotation. Press along the seal to ensure it's secure.
Twist or fold the open end to prevent spillage. Some smokers pack the end down with a pen or similar object to consolidate the flower. This works but isn't necessary if your distribution was even to start.
Common Rolling Problems and The Adjustments That Fix Them
A joint that canooes (burns unevenly up one side) results from uneven flower distribution or inconsistent density. Too much material on one side creates dense pockets that burn slower. The fix happens during the shaping phase, before you tuck. Feel for dense sections and redistribute them.
Joints that won't stay lit usually contain flower that's too moist or packed too tightly. Moisture content is the number one factor in burn quality. If you're working with fresh bud or improperly cured flower, let it air out for a few hours before grinding. Tight packing restricts airflow. Your joint should have slight give when you squeeze it gently, not feel like a wooden dowel.
Why Your Joint Keeps Unraveling
Paper unraveling mid-smoke means insufficient tuck or weak seal. The tuck must overlap enough paper to create stability. If you're working with thin papers, a longer tuck overlap compensates for reduced structural support. Practice on king-size papers first, which forgive minor tuck imperfections better than smaller formats.
Gum strips need moisture to activate properly, but too much makes them slide instead of stick. One tongue-width pass provides enough moisture. If your seal consistently fails, switch paper brands. Some gum formulations stick better than others, especially in humid environments.
The Grind Texture That Makes Everything Easier
People underestimate how much grind consistency affects rolling ease. Chunky flower doesn't pack evenly, creating air pockets and density variations. Powder-fine material compacts too much and restricts airflow. The sweet spot sits in between, each particle small enough to settle into the paper but large enough to maintain structure.
If you're getting inconsistent results with the same technique, check your grinder. Dull teeth or bent posts produce uneven particle sizes. Kief buildup on grinder surfaces also changes the output texture over time. A clean grinder with sharp teeth solves half the common rolling problems people blame on their technique.
Advanced Techniques: Cross Joint, Cone Roll, and Backwoods Method
Once you've mastered the standard roll, variations become possible. The cone roll uses the same technique but starts with more flower at the open end than at the filter, creating a tapered shape. This happens during the distribution phase: pile more material toward the tip, less near the filter.
Cross joints require three separate rolls: one main joint and two smaller ones that intersect it. The structural challenge is creating an airtight seal where the smaller joint penetrates the larger. Most tutorials overcomplicate this. A small hole through the main joint, careful insertion of the cross joint, and strategic paper patching around the intersection handles the seal. These smoke well but waste flower through the cross section, so save them for special occasions.
Rolling Backwoods and Other Tobacco Leaf Wraps
Backwoods use a completely different technique because tobacco leaf behaves nothing like paper. The leaf is thicker, irregular, and requires moisture to stay pliable. If you're interested in this format, we have a complete Backwoods rolling guide that covers the leaf-specific method. The core principles overlap but the execution differs significantly.
Standard tobacco wraps (Swisher Sweets, Phillies) split the difference between papers and leaves. They're thicker than papers but more uniform than natural leaf. Unwrap them carefully, dump the tobacco, and follow the standard joint technique with slightly firmer tuck pressure to account for the thicker material.
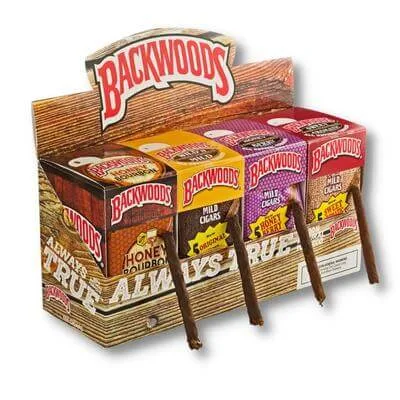
Backwoods Flavoured Cigars - Natural Leaf Wraps in Multiple Varieties
A multi-variety Backwoods listing made with flavoured Connecticut Broadleaf tobacco and...
Storing Pre-Rolled Joints Without Losing Quality
Pre-rolling joints for later use makes sense for travel, convenience, or social situations. Storage method determines whether those joints smoke properly days or weeks later. The three enemies are crushing, moisture loss, and contamination.
Glass tubes with tight caps protect against all three problems. Plastic doob tubes work but allow slow moisture exchange. The flower inside your joint continues to cure slowly after rolling. In an airtight container, this improves flavour. In a semi-permeable plastic tube, it dries the joint out over time.
Never store joints in pockets, bags, or anywhere they'll get compressed. A crushed joint develops splits in the paper and density variations in the flower column. Both issues cause uneven burning. If you must pocket-carry a joint, use a rigid tube or hard case.
Humidity packs designed for cannabis storage also work inside joint tubes for long-term storage. A 62% RH pack maintains ideal moisture content for months. Without it, pre-rolled joints start degrading noticeably after two weeks even in glass containers.
How Long Pre-Rolled Joints Stay Fresh
Properly stored in glass with humidity control, a joint maintains smoking quality for two to three months. The paper's gum seal remains stable, the flower doesn't over-dry, and flavour degradation is minimal. Beyond three months, you'll notice harsher smoke and muted terpene profiles even with perfect storage. The paper itself starts to break down slowly.
Joints stored without humidity control in plastic tubes peak around two weeks. After that, they'll still smoke but the experience declines steadily. This matches the natural shelf life of properly cured flower, which also starts losing terpenes around the two-week mark without humidity regulation.
Strain Selection and How It Affects Your Roll
Flower structure varies significantly between strains. Dense, compact buds from indica-dominant genetics grind into smaller particles that pack tightly. Loose, airy sativa flowers create fluffier grinds that require more material to fill the same space. Neither is better or worse, but they roll differently.
Sticky, resinous strains like Ice Cream Cake or Black Truffle stick to grinder teeth, papers, and fingers. They also stick to themselves, which can actually help during the shaping phase if you're struggling with looser flowers. The downside is residue on your fingers that makes the tuck harder. Keep a damp cloth nearby when rolling sticky strains.

Ice Cream Cake
Potent frosted indica with vanilla icing, sweet dough, subtle nuttiness and an earthy K...
Dry, crispy strains roll easily but burn fast. The lack of moisture means less resistance during the tuck and seal, but also means you'll smoke through the joint quicker. If you prefer slower-burning joints, slightly moister flower works better. If speed and ease of rolling matter more, drier is simpler.
Mixing Strains in a Single Joint
Combining multiple strains in one joint is common but creates practical challenges. Different moisture levels, grind textures, and densities don't blend as uniformly as single-strain loads. The result often burns unevenly unless you take extra time during distribution to manually blend the mix.
Layering works better than mixing for multi-strain joints. Place one strain at the filter end, transition to the second strain in the middle. Each section burns through completely before moving to the next, and you experience distinct flavour profiles instead of a muddled average. This requires more length though, so king-size papers handle it better than standard.
When to Use Alternative Formats Instead of Rolling
Rolling joints makes sense for specific use cases, but it's not always the optimal format. If you're consuming solo and want precise dosing, pre-filled vape cartridges or measured edibles provide better control. If you're sharing with a large group, pre-rolled cones or a bowl might be more practical than hand-rolling multiple joints.
The rise of quality pre-rolled products has shifted the economics. Premium pre-rolls from brands like Drizzle Factory use flower and rolling techniques that many home rollers can't match. If you're buying top-shelf flower anyway, the convenience premium on pre-rolls often makes sense versus the time investment in perfecting your technique.

Drizzle Factory Craft Pre Rolls 10 Pack today!
Ten slim handcrafted pre-rolls made with premium cannabis flower and a Delta-9 infusion...
That said, rolling your own gives you complete control over strain blending, density, size, and paper selection. It's also substantially cheaper when buying in bulk. Someone consuming daily will save hundreds annually by rolling versus buying pre-rolls, even accounting for the learning curve.
For Canadian buyers considering bulk options to reduce per-gram cost, our guide to bulk purchasing economics covers the break-even points where rolling your own makes financial sense.
Ready to Practice?
Get everything you need for perfect joints delivered same-day across Ottawa and Gatineau. Quality flower, rolling papers, and accessories in one order.
Shop Rolling SuppliesFrequently Asked Questions About Rolling Joints
A standard joint uses 0.3 to 0.5 grams of ground cannabis. King-size papers typically require 0.5 to 0.8 grams. The exact amount depends on how tightly you pack it and your desired thickness. Beginners should start with 0.5 grams in standard papers, which provides enough material to work with while still being economical if the first few attempts fail.
Joints that won't stay lit usually have too much moisture in the flower or are packed too tightly. Both issues restrict airflow. Let your cannabis dry for a few hours before grinding if it feels spongy or damp. When rolling, the finished joint should have slight give when squeezed gently. If it feels rock-hard, you've packed it too tight. Looser packing improves airflow and keeps the cherry burning.
A filter isn't technically required but solves multiple problems. It prevents the end from getting soggy and collapsing, stops flower from falling out the back, keeps plant material out of your mouth, and gives you something stable to hold while rolling. The structural support during the rolling process is the biggest practical advantage. Joints without filters are harder to roll properly and waste more material.
The dollar bill method is easiest for first-timers. Place your rolling paper on a dollar bill, add ground flower, insert the filter, then use the bill to shape and roll the joint by simply folding it. The bill provides structure and eliminates most of the finger coordination required. Once you understand how the tuck and roll feel with the bill's support, transitioning to hand-rolling becomes much easier.
The correct tightness allows air to flow through when you draw on it but prevents the flower from shifting around inside. If you can't pull air through the unlit joint, it's too tight. If the flower feels loose and mobile when you tap it, it's too loose. Aim for firm but not compressed. The joint should maintain its shape when you set it down but still have slight give when squeezed.
Pre-rolled joints stored in airtight glass containers with humidity control maintain quality for two to three months. Without humidity packs, quality starts declining after two weeks as the paper absorbs moisture from the flower and the whole thing dries out. Store pre-rolls vertically in rigid containers to prevent crushing. Never store them loose in bags or pockets where they'll get compressed and develop air gaps.
Final Thoughts: Practice Makes Permanent
Learning how to roll a joint well takes most people twenty to thirty attempts before the motion becomes automatic. Your first ten joints will likely smoke poorly. The second ten will smoke acceptably. Somewhere around attempt twenty-five, you'll roll one that burns evenly from start to finish and you'll understand what all the steps were building toward.
The technique described here is standard for a reason: it works across paper types, strain varieties, and moisture levels with minimal adjustment. Once you've internalized it, you can adapt to cones, blunts, or even European-style hash joints using the same foundational skills. The tuck-and-roll motion stays the same whether you're working with thin rice papers or thick tobacco leaf.
Start with cheap flower and standard papers. Practicing on premium strains wastes money and creates pressure to get it right the first time. Use shake or budget ounces until the muscle memory develops. The rolling technique doesn't change based on flower quality, so learn on the affordable stuff and upgrade once you're consistent.
If you're in Ottawa, Gatineau, or anywhere in Canada, UperWeed delivers everything you need to practice: quality flower across all price ranges, multiple paper options, and grinders that produce the right texture. Same-day delivery in the National Capital Region means you can order tonight and practice tomorrow. Check how our delivery service works and get started with a selection built for learning.